Wildcat speaker replacement
Does you full size Buick's speaker sound
bad? It may distort horribly at any reproduction of low frequency, or it may go
in and out as you go down the road. If you have the symptoms, the usual culprit is usually that your speaker has outlived it's lifetime. Speakers in
these cars were made before the advent of foams and extensive coatings found in
speakers today, so even if your was always kept your Buick in a garage there is a pretty good
chance the paper speaker has rotted.
The symptom I experienced was the speaker
losing sound intermittingly. I have previously seen the speaker from the bottom
and thought all was well. When I replaced my heater core
(seen here), I had the
speaker out of the car and decided to check it out thoroughly.
This procedure is for the big-car/Riviera series and only applies to the front
speaker.
Any picture below can be enlarged by
clicking on it.
Disassembly:
To begin, remove the two screws close to
the windshield that held the speaker/defroster outlet in place. I have placed
arrows pointing to these screws in the picture below. Please excuse the good
luck Schnauzer blocking the view to the left screw.

Once the screws are removed, pry up from the back first until the grille is
tilted. There are two "fingers" in the front of the grille that must come toward
the windshield about 1/4 of an inch before you can pull the grille up. Once you
get the grille out on the dash, disconnect the connectors to the speaker. These
just pull off. You will want to make a mark on the positive and negative
connector so you do not mix them up.
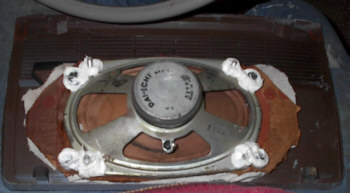
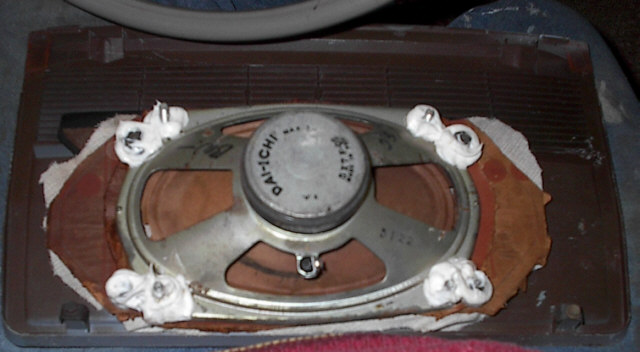
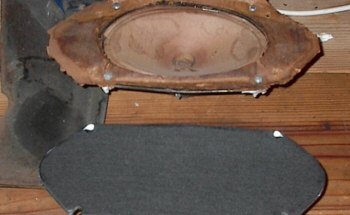
Once the speaker is disconnected, you can place it on the bench to work. If you
notice in the picture above, I had a unique situation. My father replaced the
speaker about two decades ago when he was stationed in the
Philippine Islands with the Air Force. He faced the problem many face today, in the scarcity of
finding a 4x10 10 ohm speaker. What he ended up doing what mounting a 5x7 8 ohm
speaker to a piece of cardboard, then mounting the cardboard to the original
speaker studs. He also placed a layer of cloth above the speaker. The white
adhesive is RTV.
For an original speaker, simply remove the four nuts that hold the speaker to
the studs.
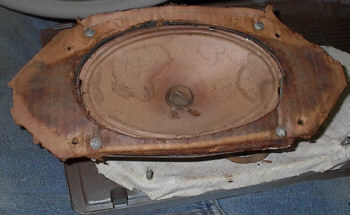
Here is what the decades old speaker looks like. The center part of the speaker
was fully disconnected. Where the speaker attaches to the cone, it was pretty
much gone.
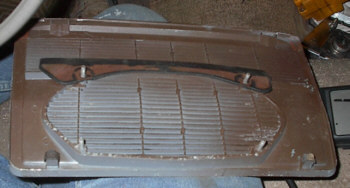
Once the speaker has been removed, you are down to the grille. Be very careful
with the plastic piece that is under the speaker. I think it is some kind of
defroster deflector. I wasn't gentle with mine upon re-installation and ended up
taking a few chips out of it (shown a few pictures below).
Now that you have the old speaker out,
you have a couple of ways to fix your issue with it:
1) Get the speaker reconed.
2) Purchase a replacement reproduction speaker.
3) Try to find a NOS speaker locally or on an online auction site (I don't
recommend; I'll explain below).
These choices are based on you having the
stock factory radio. If you have an aftermarket radio or have converted your
factory radio to drive a modern amplifier, you can do some neat things such as
buying an adapter that lets you mount two 4" speakers in the same space for
stereo sound.
If you want to have the speaker re-coned,
wonderbarman.com offers this service. He charges "$100.00 each on most."
I chose to purchase a brand new
reproduction speaker. As I found, there are two places that sell these. One is
wonderbarman.com. He advertises "New China replacement" speakers for $29.99. He
does not advertise what impedance they are, or how much shipping is. The other
place, which is where I purchased from, was S/M Electro-Tech, Inc., in Blaine,
MN, which operates turnswitch.com. You can
see their selection of speakers
here. They advertise a 4x10 "8-10 ohm" speaker on their website for $36.95.
The original Delco speaker was 10 ohms, so they have to say "8-10 ohm
compatible" for those out there that might freak out for the difference of two
ohms. Unless the transistors are marginal to begin with, the difference of two
ohms should not be an issue for your radio. Now, if you went to a 4 ohm speaker
you'll probably burn up your radio because you would be making the transistors
work almost three times harder to drive the load.
S/M Electro-Tech's website had not been updated since 2007, and when I called
they had made some tweaks to the speaker design, and price has risen just $2 to
$38.95. After $7.50 for Priority Mail shipping, My total came to $46.45. They
were very knowledgeable on the phone and they have a great amount of information
written on their website. Their speakers also come with a five year warranty
against manufacturer's defects.
Here is my new speaker compared to the
old one:
If you are a purist the thought of a NOS
speaker may appeal to you. These pop up on eBay often and you may be able to
find them locally somewhere. Just make sure their impedance is 10 ohms or they
are not original. Here is the reason I don't think you should buy one of these:
Paper speakers degrade whether they are in a car, in a basement, or on a shelf.
NOS might look fine, but there is nothing to say you don't hit a bump after
installation and the cone cracks. I chock this up to the poor economy of buying
a NOS heater core, transmission filter or the like. If no one will ever see it,
replace it with sometime modern that should buy you a few years until failure
instead of a chance it will happen instantly.
Re-assembly:
After cleaning your speaker/defroster grille, place it upside down flat on
the workbench. Carefully make sure the defroster deflector is in correctly in
place. Do not place much pressure on this, as it will likely be brittle and can
crack. You can see below I busted mine nearly in half. Place the speaker down
through the mounting studs making sure the connectors face the same side as your
original speaker. Torque the speaker down until it is tight. You may want to use
some mild thread locker if you are worried about the nuts vibrating off.

Bring the assembly to the car, and
re-attach the speaker electrical connections. Turn the radio on and make sure
the speaker pushes out (toward the grille). If it sucks in, the polarity is
wrong. If it sucks in, pull off the electrical connectors, swap them, and put
them back on.
Place the speaker and grille back in the
hole it came out of, positioning the front "fingers" into their receiving holes,
and then let the back down gently. Check for proper positioning and that the
defroster grille is aligned the best it can be, and then replace the two screws.
Turn on your radio, and enjoy the tunes!