Replacing a 64 Wildcat
Driveshaft Center Bearing Support
The procedure is the same for LeSabre and
Electra
So, you have just pulled your 64
full-size car out of storage, or a junkyard, or off the rollback after a tow
home. You put the car in drive or reverse, and get a definite clunk every few
feet that feels like someone is taking a rubber mallet to the floorboard. That
feeling is caused by a broken driveshaft center bearing support.
Buick used some neat technology in
1964 which included a cruciform (X) frame and a two piece driveshaft with a
double universal joint in the center. Where the two pieces of the "X" frame
meet, there is a hollow tunnel that goes through them that the driveshaft passes
through. Within this tunnel sits the double universal joint, and in front of it
is a driveshaft bearing suspended in a rubber bushing that is molded into a
metal bracket. Over the years the rubber between the bearing and the bracket
deteriorates, and after a rough experience such as a tow, hard slam into gear,
the rubber gives way, and the driveshaft falls in the middle. With nothing to
keep the driveshaft straight and suspended, it merely knocks around in the
tunnel. This is neither good for the car or the driveshaft. Luckily, parts are
readily available and the task of replacing the bearing can be accomplished in
half a day.
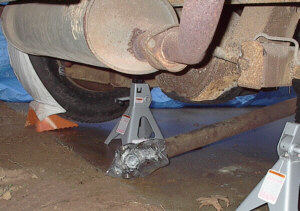
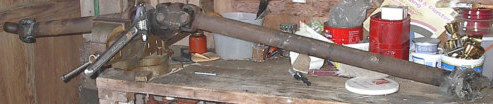
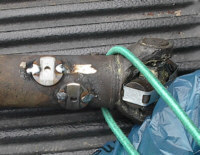
Start by removing the four driveshaft U bolt nuts.
I recommend a stubby wrench and plenty of patience. Once the nuts are removed,
you can carefully remove the U bolts while supporting the driveshaft. You will
be able to move the driveshaft forward and then let it carefully dangle or come
to rest on the ground.

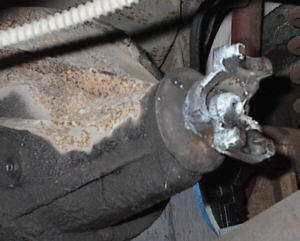
To the left you can see where I took a preventative measure to keep my
driveshaft clean. There is dirt beyond the concrete pad I am working on, so I
wrapped plastic bags around the end bearings to keep them from getting muddy. On
the right, you can see the mound of dirt and general crap that came out of the
driveshaft tunnel before the bearing. Wear safety glasses when working under a
car! This is my first peek at what has been making the racket.
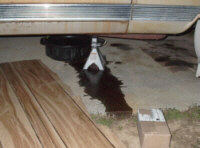

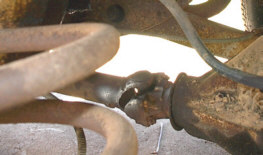
The picture to the left is a friendly reminder to put a pan under the output
shaft of your transmission and put a plug in it. If not, you get an
environmental problem. I seem to be the worst at remembering things like this,
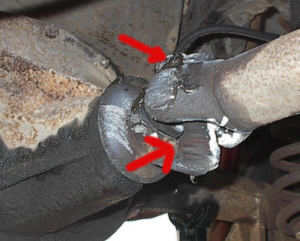
so I keep the kitty litter company in business. To the right, a close up of the
issue. The rubber just deteriorates and one good jolt, and no more suspended
bearing.
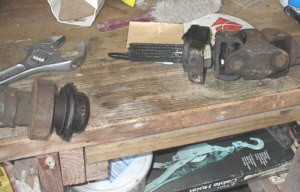
Mark with chalk or marker exactly where each half meets each other before you
take it apart. The driveshaft has a nut that has to come off so you can separate
the two halves. It is a very large size, over an inch, so most non-professional
mechanics will need to buy the $40 adjustable wrench that can handle it or beg,
plead, or rent one. Be extra careful in a vise with a driveshaft! They
are hollow tubes, and too much pressure will distort them.
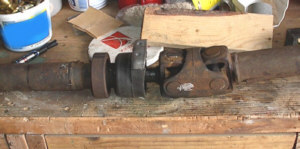
This is the everything taken apart. Note to the left there is a metal ring that
kiss the front of the new center support bearing. Lube these splines up gingerly
while you have them out and make sure not to get abrasives embedded in the
grease while you work.
Here is what you need to complete the repair. This is a Powertrain Industries
3R80-10 Center Bearing Support. It is listed with a bearing I.D. of
1.575, and mounting holes at 1.50 center to center.
CARS, Inc. out of New Jersey sells
them for around $90. I lucked out in that my local driveshaft shop had the part
in stock. Should you prefer to order the part from another vendor, contact
Powertrain Industries for a dealer near
you. Mine did not come with a bearing. You can reuse your old one if you like,
but I purchased a new one from a local auto parts chain. It is BCA bearings
X908CC, the same
maker as the OEM bearing. It is around $60 as of 2006.
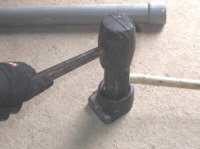
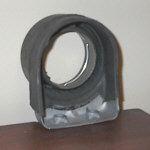
To the left is how I installed the new bearing in the center support. After
removing the included bearing retaining ring, I pushed the bearing into the
support. Then, I cut a small ring of 2 inch PVC conduit that fit the bearing
almost exactly. I then put a small mallet on top of the ring, and then hit that
mallet with a larger mallet. The bearing seated, and I was able to install the
bearing retainer, but I found out later this was not enough. The bearing would
produce a shrill sound which subsided when I took the whole nine yards to the
driveshaft shop which found the bearing needed to be seated 1/8 more to be
perfect. To the right is the new bearing installed.
As I previously mentioned, I had to take the driveshaft to the shop
because I was getting a shrill sound from the bearing. While it was there, I had
it balanced. It took the two weights on the one end, pictured at the right, and
it took one weight on the other end. It was around $50-$60 to get the shaft
balanced.
Once you are done with the bearing, the driveshaft goes back in just like it
came out. Once it is seated in the transmission, you will adjust it out until
the center support nut holes are visible through the tunnel holes and secure the
bearing. After that, reattach the rear U-bolts, and go for a drive!