| 2021 Brake Overhaul As spring of 2021 got underway, I was putting serious miles on Sherman because I needed to get around 2,000 miles on the engine to get it fully broken in. Through my travels, the car started locking up the passenger rear tire. Upon inspection, I found that the wheel cylinder had rust in it, likely not allowing the pistons to return properly, heating the shoes, and leading to premature wear, a lot of brake dust, and cracking. After replacing the back hardware, wheel cylinders, and shoes, I inspected the front. The front wheel cylinders were also rusted, so they were replaced as well as the adjusters. The shoes and hardware was satisfactory, so it just got cleaned. Follow along below: |
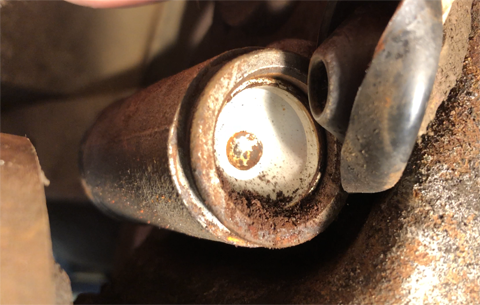
| Inspecting the shoes on the problem wheel revealed they were cracked. One of the symptoms of cracking brake shoes is overheating, either by the pad being kept in contact or riding the brakes. Pulling open the rubber boots on the wheel cylinders on the car showed rust in all of them, so the car got new wheel cylinders all around. The rear cylinders are quite common, and I replaced them with AC Delco parts with a 1 year warranty. They were about $10 each. The front wheel cylinders were $43(!) each, coming from Advance Auto, but carrying a limited lifetime warranty. |

| I'd been eyeing brake tool kits because after doing drum and disc brakes on my late model cars, I could see the benefit of having purpose built tools instead of using Vice Grips and C clamps with wood in them. I picked up this Craftsman Kit, CMMT98283, for $80 at my local Lowe's. Note that this kit is simply a re-badged KD Tool/Gear Wrench 41520 Brake Service Kit. The KD model is $15 cheaper, but I knew that going in, and paid for convenience. |


| The front brakes get underway. On my Wildcat, a tire repair shop removed the rivets from the drum to the hub. While I was aggravated initially, the consensus seems to be the rivets are just for holding the drum on during the assembly line process, and the advantage is not to have to risk scarring a wheel seal. For the front brakes, the springs looked A-OK, but the wheel cylinders were rusty and were replaced, and the self adjusters also got replaced. |

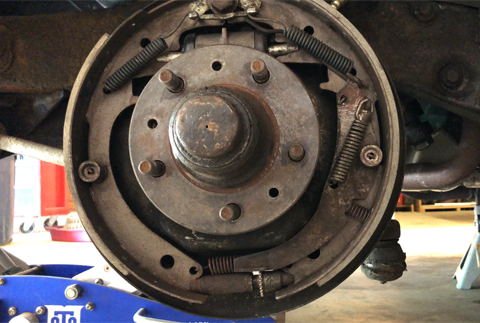

| Below is a before and after of the rear brakes. The after picture was taken post test drive. The rears received all new springs, shoes, and wheel cylinders. |


| Below, a new and old rear wheel cylinder are side by side. The installation went easy because in 2015 I replaced all the brake lines in the car with stainless steel versions. |


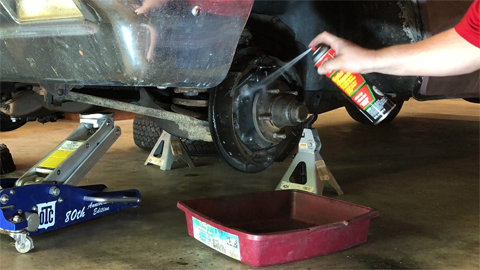
| Once all the individual wheel hardware was put to bed, it was time to bleed the brakes. To start the process, I removed the previous DOT5 fluid from the master cylinder with a turkey baster. Interesting, the DOT5 fluid had lost all its purple color, whereas fresh from the bottle when refilling for bleeding, the dye is visible. |


| Using Speed Bleeders (Dorman photo), I was able to do one-person brake bleeding. The bleeders have a check valve, so it is not necessary to close the bleeder between each application of the brake pedal. Another note for DOT5: Press down on the pedal slowly, and let the pedal come back up controlled with your foot, also slowly. This keeps bubbles from being generated. Below, I watch until the caramel colored fluid is replaced with the purple colored fluid, and no bubbles appear in the fluid. |


| The tires were all put on and the car was road tested. I had to grind the passenger rear brake shoes because they were rubbing on the inside face of the drum. After that the road test was successful. Brand new reproduction brake and parking brake pads were installed. |

