|
In the quest to have a factory appearing a heater valve in my Wildcat, I was constantly researching solutions for the leaking heater valve that sits on the passenger side inner fender. I had looked at many solutions, from the $16 parts store universal cable operated valve to using a Vintage Air (OEM is Newbase) electronic servo valve in a more hidden location. Each had a downside. I discovered that someone is reproducing heater valves for the 1961-1962 Chevrolet Impalas. These valves are very close to the construction of the Buick valves. While made for Impalas without A/C, the input and output are 5/8, and the mounting tab is exactly the same. The issues to overcome is the lever is on the "wrong" side of the valve, and instead of one of the hose connections being "straight", it comes out at a 45 degree angle. Both of these issues are easily overcome. |
|
|
|
In the picture above, a 1964 Buick Wildcat
with A/C valve is shown on the left, and a 1961-1962 Impala without A/C
heater valve is shown to the right. I'm not sure what company is reproducing
these, but they can be purchased from the following companies with the
following part numbers. In 2019, prices range from $116-$138 with various
shipping options: |
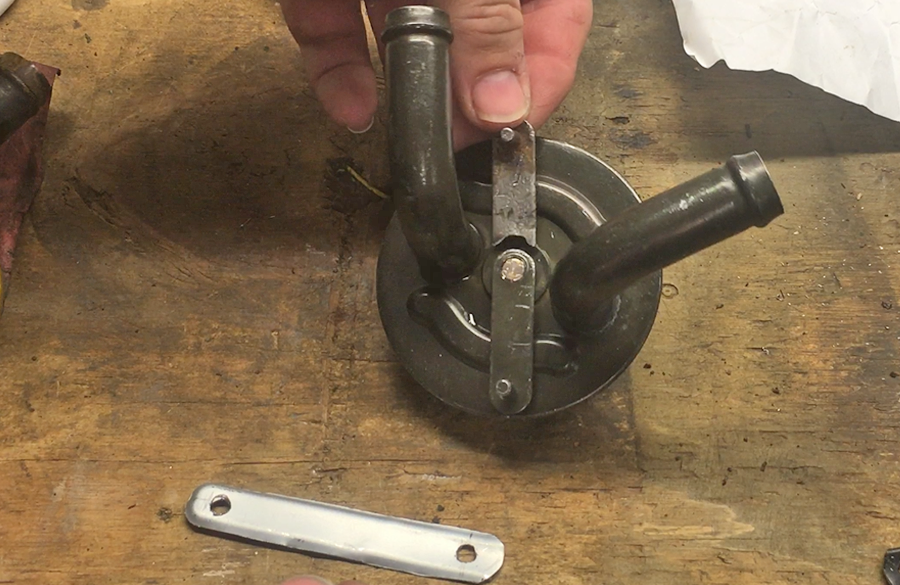
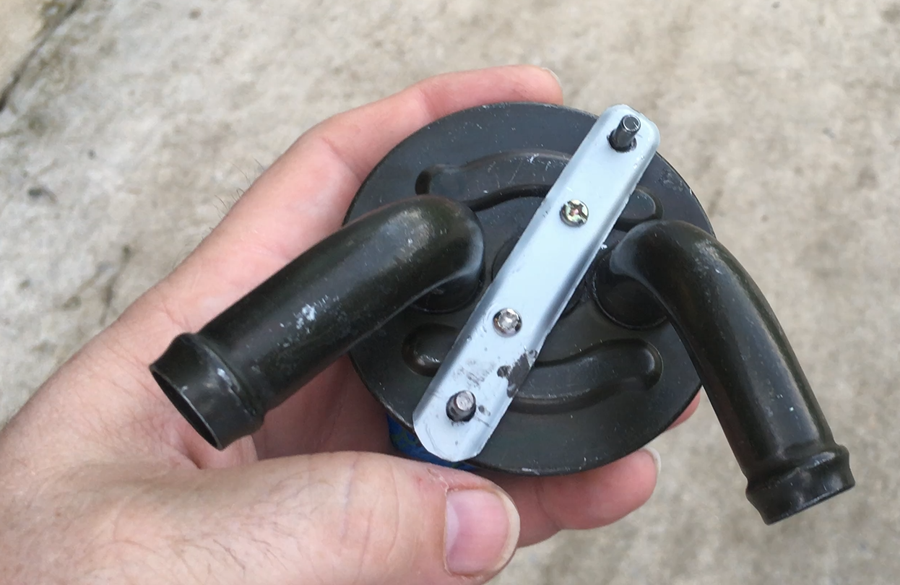
| Below, the lever from a broken valve is removed. It is then ground down until it will press against the Impala lever tightly. A bracket that spans the two levers was then made out of some light scrap metal. Holes were drilled for each stalk of the levers to pass through and fit tightly. |
|
|
|
|
|
|
|
In order to overcome one end of the Impala valve's water connection not being straight, I researched and found this 5/8 x 5/8 hose manufactured by Gates that has a 90 degree bend formed in. It is part number 28473, and is 4 inches long by 5 feet long. The 4 inch side of the hose must be cut down to size, and the hose will have enough length left after going to the heater core to plumb the other end going to the engine without needing to buy any additional 5/8 inch hose. |
|
|
|
Below, the hose cut is and in place for testing. Once the engine is installed and all the other components are in place it will be more precisely cut and clamped. Also, the spanning bracket has been painted to help it blend in. |
|
|
|
Check out the YouTube video below set to the time all the information about the heater valve is shown. It includes the process of testing if the valve will work in the application and showing what the inside of a heater valve looks like: |